
Maverick X3 Intercooler Selection Guide for Riders
Posted by Drew Cummings on Oct 26th 2026
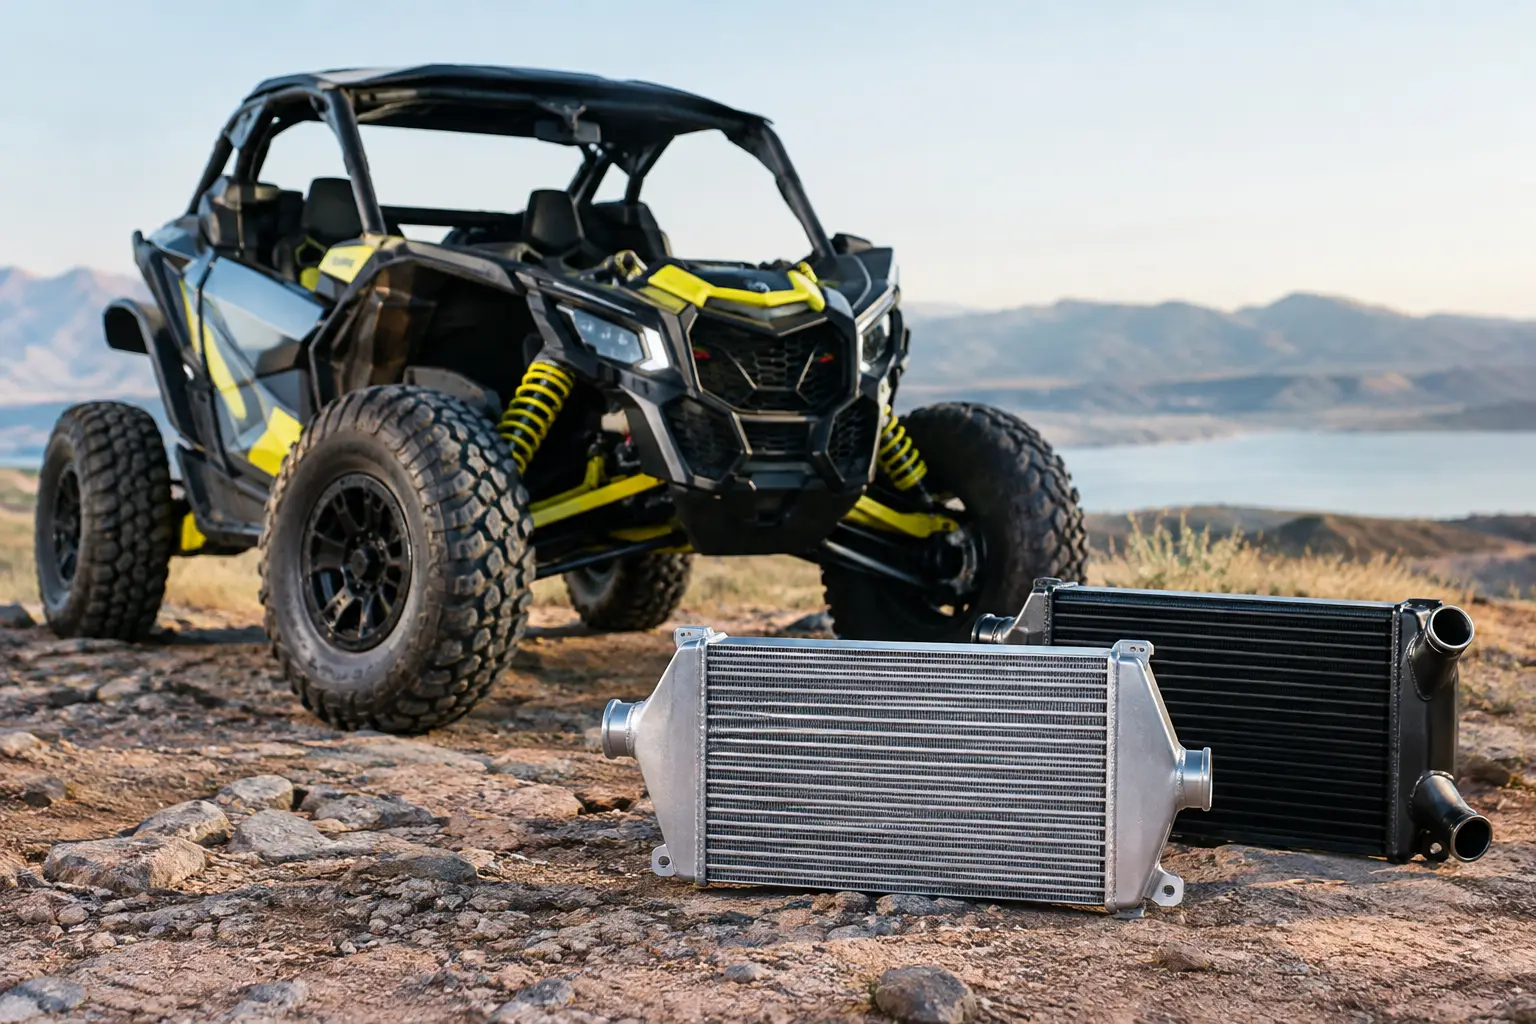
Heat is the quiet power killer in a turbocharged Maverick X3. A machine can feel strong during the first hard pull, then lose consistency as intake temperatures climb through dunes, tight woods, long desert sections, or repeated high-boost runs. This Maverick X3 intercooler selection guide focuses on choosing an upgrade that matches your machine, power level, and riding conditions instead of simply buying the largest core available.
Know When an Intercooler Upgrade Makes Sense
The factory intercooler system is designed around stock output, typical airflow, and average-use conditions. It can do its job well on a stock machine used for casual trail miles. The need for a larger or more efficient intercooler becomes clearer when the vehicle is tuned, driven hard in hot weather, loaded with gear, or operated in terrain where airflow is limited.
Heat soak is the common issue. After several hard acceleration runs, the intercooler absorbs more heat than it can shed. Intake air temperatures rise, and the engine management system may reduce power to protect the motor. The rider feels that as a machine that pulls harder when cold than it does later in the ride.
An intercooler upgrade is worth considering if you regularly experience any of these conditions:
- A tune, clutch work, turbo upgrade, or other modification that increases boost and horsepower
- Sand dune riding, desert riding, or summer trail use with high ambient temperatures
- Long pulls, deep sand, heavy cargo, or sustained high-speed riding
- Noticeable power fade after repeated wide-open-throttle runs
If your X3 is stock and primarily used for relaxed riding in moderate weather, the factory intercooler may be adequate. Spending the budget first on protection, tires, maintenance, or recovery equipment can be the smarter move. The right upgrade is based on the job your machine actually does.
Maverick X3 Intercooler Selection Guide: Start With Fitment
Fitment comes before core size, finish, or advertised airflow. Can-Am Maverick X3 models vary by year, trim, turbo configuration, intake routing, and accessory setup. A product listed for one X3 platform may not fit another without modification, even when the machines look nearly identical from the rear.
Confirm the exact year, model, and trim before ordering. Check whether the intercooler is designed for your Turbo, Turbo R, DS, RS, X rs, X RC, X MR, or other specific configuration. Also account for existing aftermarket parts. Rear bumpers, exhaust systems, cargo racks, engine covers, and charge pipes can affect clearance or installation access.
A direct-fit intercooler saves time and eliminates unnecessary fabrication. Look for kits that include vehicle-specific mounts, brackets, couplers, clamps, and hardware where needed. If a kit requires trimming or relocation, make sure that trade-off makes sense for your build and your comfort level in the shop.
Choose a Core for Your Power and Riding Style
Intercooler capacity matters, but bigger is not automatically better. A larger core can provide greater cooling surface and thermal capacity, especially under sustained load. It can also add weight, consume valuable space, and require changes to ducting or mounting. The best option is the one that keeps charge-air temperatures controlled without creating fitment headaches or restricting the system around it.
Core size and cooling efficiency
For a stock or mildly tuned trail machine, a quality replacement intercooler with improved core design and durable end tanks may be all that is needed. These upgrades are often aimed at better heat rejection, improved reliability, and consistent performance without turning the install into a major project.
Higher-horsepower X3 builds need more thermal capacity. If you run an aggressive tune, larger turbo, or spend full days in the dunes, prioritize a larger high-flow core designed to manage repeated boost cycles. Look at the intended horsepower range, not just peak horsepower claims. A part built for occasional high-output use may not handle the same heat load during continuous sand riding.
Airflow is part of the system
An intercooler can only work with the air that reaches it. Mud, dust, grass seeds, and debris can block cooling fins quickly, especially on trail machines and hunting rigs. Larger cores need clean, usable airflow to deliver their advantage.
Consider how the intercooler will work with your intake path, shrouding, ducts, and rear-mounted accessories. A well-designed shroud can help direct air through the core instead of allowing it to escape around the edges. Some riders also benefit from an auxiliary fan setup where slow-speed riding or limited natural airflow is the norm.
Do not overlook pressure drop. Extremely dense cores can cool effectively but may create more resistance in the charge-air path. On a high-performance build, the goal is balanced performance: lower intake temperatures with efficient airflow to the engine.
Construction that holds up off-road
Off-road equipment needs more than good lab numbers. Pay attention to aluminum end tanks, secure weld quality, reinforced mounting points, and a core built to withstand vibration. The Maverick X3 chassis sees hard impacts, frame flex, washboard roads, and engine movement. Weak brackets or poorly aligned couplers can turn a performance upgrade into a boost leak.
Fin density also involves a trade-off. Closely packed fins can provide more surface area, but they may be harder to clean after muddy or dusty rides. Riders who spend time in wet trails or on ranch property should choose a setup they can inspect and service without major disassembly.
Match the Intercooler to How You Ride
Dune riders generally need maximum heat control. High ambient temperatures, long boost events, and deep sand put a heavy load on the turbo system. A larger, high-capacity intercooler with strong airflow management is a practical investment, particularly on tuned machines.
Fast desert riders face similar thermal demands, plus fine dust that can pack into cooling fins. Choose an intercooler that is easy to inspect and pair it with a regular cleaning routine. A clean, moderately sized core will outperform a large core that is clogged with dirt.
Tight-woods riders often see less consistent airflow at low speeds. If your rides involve technical crawling, stop-and-go terrain, or slow hunting access trails, fan assistance and effective shrouding can matter as much as raw core size. A giant intercooler without air moving through it will not solve low-speed heat issues.
For work-oriented X3 owners, durability and serviceability should lead the decision. Hauling tools, checking fences, carrying feed, or moving around property may not require a race-oriented setup. A direct-fit replacement built with stronger materials and easy maintenance access is usually the more useful upgrade.
Plan the Supporting Parts Before You Install
An intercooler works with the rest of the charge-air system. Old couplers, weak clamps, cracked hoses, and poorly routed piping can waste the benefits of a new core. Inspect every connection while the system is apart.
If your build runs higher boost, upgraded charge pipes and heavy-duty clamps may be worthwhile. They can reduce the risk of couplers blowing off under load and help maintain consistent boost pressure. A properly calibrated tune, sound clutching, and clean intake filtration also matter. An intercooler will manage charge-air heat, but it cannot correct an engine setup that is poorly matched to the vehicle.
Gauge data is useful when available. Monitoring intake air temperature and boost lets you evaluate whether the upgrade is doing what you expected. It also provides an early warning if a hose loosens, a fan fails, or debris begins restricting airflow.
Installation and Maintenance Details That Matter
Follow the manufacturer’s installation instructions exactly, especially for mounting hardware, hose routing, clamp orientation, and torque specifications. Before reinstalling body panels, inspect every coupler for even engagement and confirm that no hose is rubbing against a sharp edge, exhaust component, or moving part.
After the first ride, recheck clamps and mounting bolts once the system has been through heat cycles. Then make intercooler cleaning part of routine maintenance. Use low-pressure water and gentle airflow to remove debris without folding delicate fins. Avoid aggressive pressure washing at close range, which can damage the core and reduce its ability to shed heat.
Buy for Fitment, Not Just the Biggest Number
The strongest Maverick X3 intercooler choice is usually a direct-fit unit built for your exact model and honest riding conditions. Compare core design, mounting system, airflow support, construction, required supporting parts, and installation demands before deciding. Side By Side Sports can help narrow the field when you need a fitment-specific performance upgrade without sorting through generic parts that may not belong on your X3.
Choose the intercooler that gives your engine a better chance to stay consistent when the trail gets hot, the sand gets deep, and backing out of the throttle is not part of the plan.