
How to Upgrade UTV Suspension the Right Way
Posted by Drew Cummings on Jul 16th 2026
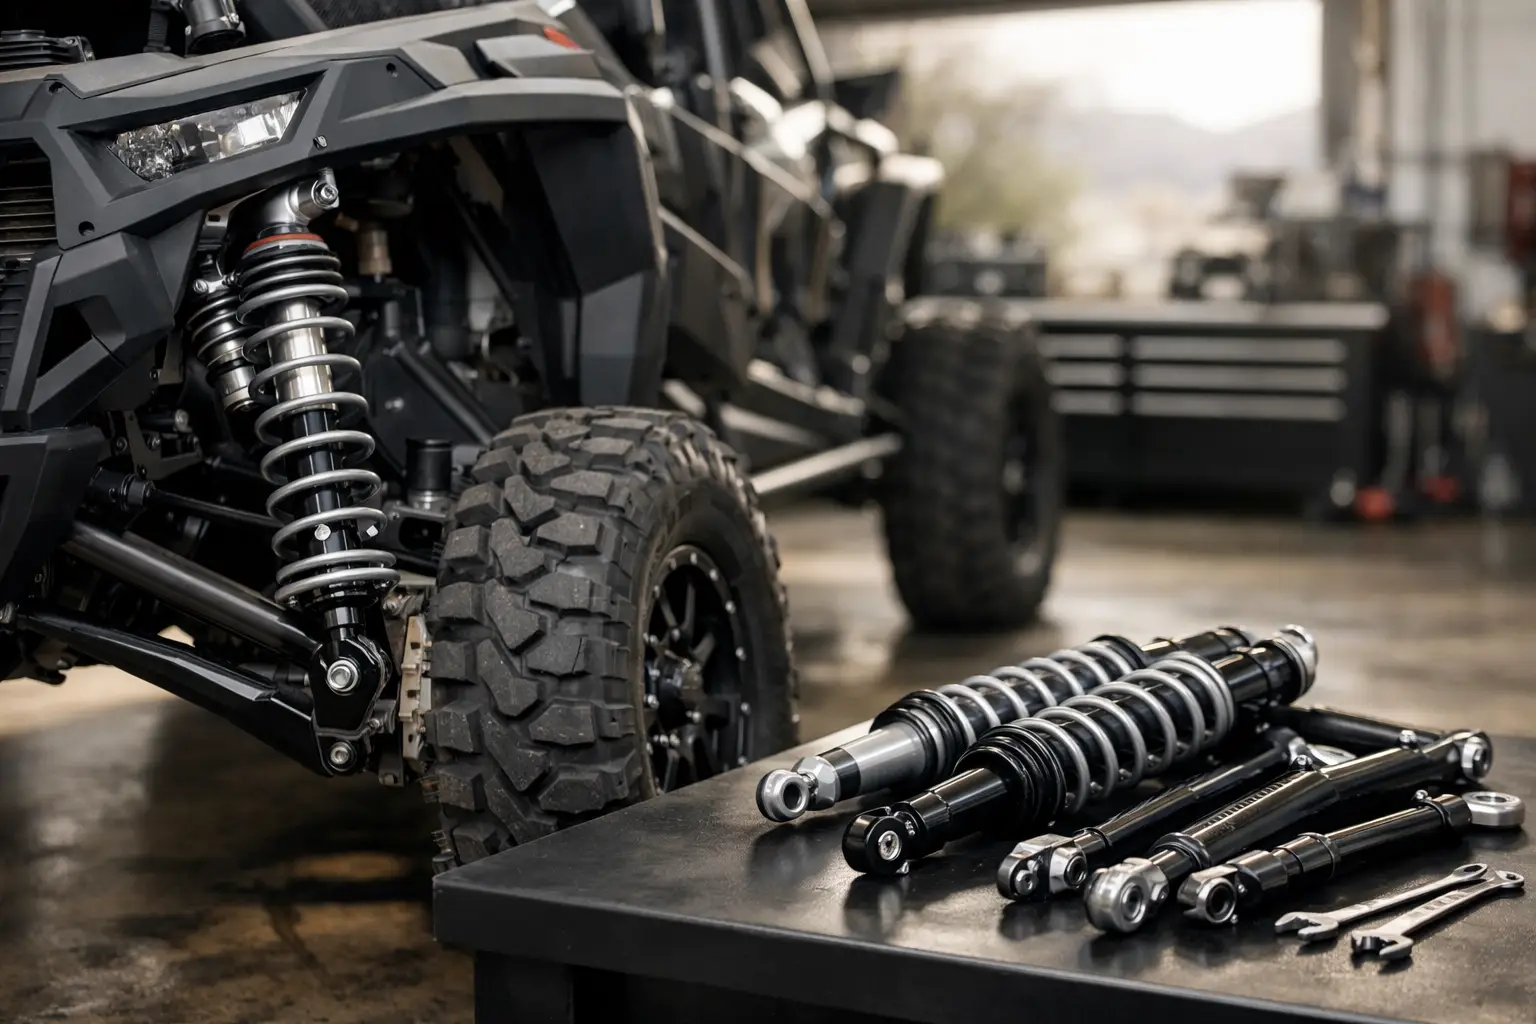
A washboard road that pounds through the steering wheel, a rear end that squats under a loaded cooler, or a front suspension that bottoms in every drainage dip are all signs your UTV needs more than another click of preload. Knowing how to upgrade UTV suspension starts with identifying what the machine does wrong in the terrain and workload you actually use.
A suspension package built for fast desert runs is not automatically the right answer for a Polaris Ranger hauling feed, a Can-Am Defender plowing snow, or a Yamaha Wolverine covering tight wooded trails. The right upgrade improves control, keeps tires planted, protects the chassis from hard hits, and lets you use the vehicle with more confidence.
Start With Your Riding Conditions and Payload
Before choosing shocks, springs, or a lift kit, be honest about how the UTV spends most of its time. Factory suspension is a compromise. Manufacturers have to account for a broad range of riders, terrain, payloads, and price points. That often means stock springs and shocks work adequately when the machine is new and lightly loaded, but show their limits once accessories, passengers, tools, and bigger tires enter the picture.
Think about your most common use. Trail riders may need better damping control through repeated chop and whoops. Hunters and ranch owners may need springs that hold ride height with a cab enclosure, winch, bumpers, cargo, and a full bed. Riders who run sand or higher-speed open terrain may prioritize bottoming resistance and stability. Rock and technical trail riders often need controlled articulation without excessive lift or a harsh ride.
Weight matters more than many owners expect. A roof, windshield, doors, front bumper, winch, skid plates, spare tire carrier, and sound system can add several hundred pounds. Add two adults and gear, and a UTV with stock-rate springs can ride low in its travel. That reduces ground clearance, changes alignment angles, and makes bottom-outs more likely.
Inspect the Existing Suspension First
Do not assume every rough ride calls for a complete suspension replacement. Worn components can make a healthy setup feel bad. Check the machine on level ground and look for leaking shock bodies, damaged shafts, sagging springs, cracked bushings, loose sway bar links, worn ball joints, and play in the wheel bearings.
Pay attention to tire condition and tire pressure as well. Overinflated tires can make a side-by-side feel harsh and skittish, while a damaged tire or incorrect pressure can mimic suspension problems. Confirm that your wheels, tires, and suspension components are correctly matched before spending money on larger upgrades.
If the shocks have many hard miles and cannot be serviced or rebuilt, replacement shocks may be the most direct improvement. If the shocks are still in good condition but the UTV sags when loaded, springs may be the first place to focus.
Choose the Upgrade That Solves the Problem
Better Shocks for Damping Control
Quality aftermarket shocks are one of the most noticeable upgrades for riders who push their UTV beyond casual cruising. Shocks control the speed at which the suspension compresses and rebounds. Springs support weight, but shocks determine whether the vehicle feels composed or uncontrolled after it hits an obstacle.
A better shock package can reduce bucking in whoops, keep the chassis from wallowing through corners, and limit harsh bottom-outs. Many premium options offer adjustable compression, rebound, or both. Those adjustments let you tune the ride for a lightly loaded trail day, then add control when carrying passengers, cargo, or hunting equipment.
Adjustability is useful, but it is not a substitute for correct spring rates. A shock can be tuned around small changes in load and terrain. It cannot fully correct a machine that is severely undersprung for its real-world weight.
Springs for Added Accessories and Load Capacity
Spring upgrades make sense when the UTV sits low, dives under braking, squats with cargo, or bottoms too easily despite properly functioning shocks. Heavier-rate or dual-rate springs can restore ride height and provide more usable travel under load.
Dual-rate setups are popular because they can offer a compliant initial ride while building support deeper in the suspension stroke. They are not automatically better for every machine, though. The correct choice depends on vehicle weight, accessory load, driver and passenger weight, and intended terrain.
When shopping, account for permanent accessories rather than occasional cargo alone. A front-mounted winch and bumper affect front spring requirements. Rear cargo systems, spare tires, tool mounts, and bed equipment affect the rear. Choosing model-specific springs is critical because spring length, diameter, and rate must work with the factory or aftermarket shock package.
Lift Kits for Clearance, Not a Cure-All
A lift kit can provide clearance for rough trails, deeper ruts, and larger tires. It can be a practical addition for utility riders working in mud, snow, or uneven property. But lift height should be selected carefully.
More lift can increase CV joint angles, change steering geometry, and raise the center of gravity. A tall lift may look aggressive but can make a UTV less predictable in off-camber terrain or fast corners. If your goal is simply to stop bottoming out, upgraded springs and shocks are often a better first move than adding lift.
Choose a kit designed for your exact make, model, and year. Polaris, Can-Am, Yamaha, Kawasaki, and Honda platforms have different suspension geometry, axle limits, and fitment requirements. A model-specific kit helps prevent clearance issues and avoids guessing during installation.
Match Tires, Wheels, and Suspension Geometry
Suspension changes do not happen in isolation. Larger tires increase unsprung weight and place more leverage on shocks, springs, axles, steering components, and brakes. They can also affect acceleration and clutch performance. A UTV that handled well on stock tires may need firmer damping or spring support after moving to a significantly larger, heavier tire package.
After any major suspension, lift, or tire change, inspect for full steering and suspension travel. Turn the wheels lock to lock, cycle the suspension where possible, and check for tire contact with fenders, shocks, control arms, brake lines, and steering components. Verify that CV boots are not stretched or contacting nearby parts at full droop.
Alignment should also be checked after installation. Incorrect toe can wear tires quickly and make the UTV wander on the trail. If adjustable control arms or radius rods are part of the build, use them to bring alignment back into specification rather than forcing components to fit.
How to Upgrade UTV Suspension in the Right Order
For most riders, the smartest approach is to build in stages. Start by correcting wear and setting the vehicle up for its current weight. Then upgrade the components that address the biggest limitation instead of buying parts based only on lift height or appearance.
A practical order looks like this:
- Replace worn shocks, bushings, ball joints, and related hardware.
- Add springs matched to permanent accessory weight and typical payload.
- Upgrade to adjustable or higher-performance shocks for your terrain and speed.
- Add a modest, model-specific lift only if additional clearance is truly needed.
- Recheck alignment, axle angles, tire clearance, and suspension travel after every major change.
This approach protects your budget and keeps the machine balanced. Installing tall lifts and oversized tires before addressing weak damping or sagging springs can create more problems than it solves.
Set Up and Maintain the New System
Once the components are installed, take time to set preload and damping correctly. Measure ride height with the vehicle on level ground and loaded as it is normally used. If you frequently ride with a passenger or carry equipment, tune for that condition rather than for an empty machine in the garage.
Start with the shock manufacturer’s baseline settings. Make one adjustment at a time and test it on familiar terrain. If the UTV feels harsh over small chatter, compression damping may be too firm. If it continues bouncing after a hit, rebound may be too soft. If it blows through travel and bottoms, you may need more compression support, more preload, or a spring rate better matched to the load.
Keep shock shafts clean, inspect for leaks after hard rides, and service rebuildable shocks on schedule. Suspension works hard, especially in dust, mud, water, and high-mileage utility use. Regular inspection keeps a small issue from becoming a bent component or an expensive trail recovery.
The best suspension upgrade is the one built around your machine, your cargo, and your ground conditions. Select fitment-specific parts, avoid chasing unnecessary lift, and ask for expert guidance when accessory weight or setup choices are unclear. Side By Side Sports can help you narrow the options so your UTV rides like a tool you can trust, whether the day calls for tight trails, hard work, or both.