
UTV Light Bar Wiring Kit Buying Guide
Posted by Drew Cummings on Jul 1st 2026
A light bar install can go sideways fast when the wiring is an afterthought. The bar may fit the cage perfectly, but if the harness is undersized, the switch is cheap, or the relay is exposed to mud and water, you end up chasing flickers, blown fuses, or a dead battery at the worst time. That is why a quality utv light bar wiring kit matters just as much as the light itself.
For UTV owners, the right kit is not just about getting power from the battery to the bar. It is about matching amperage, routing cleanly through a cab or firewall, holding up to vibration, and fitting how the machine is actually used - night trail riding, hunting, ranch work, snow plowing, or recovery after dark. A wiring kit that works on paper is not always the one that lasts on a side-by-side.
What a UTV light bar wiring kit should include
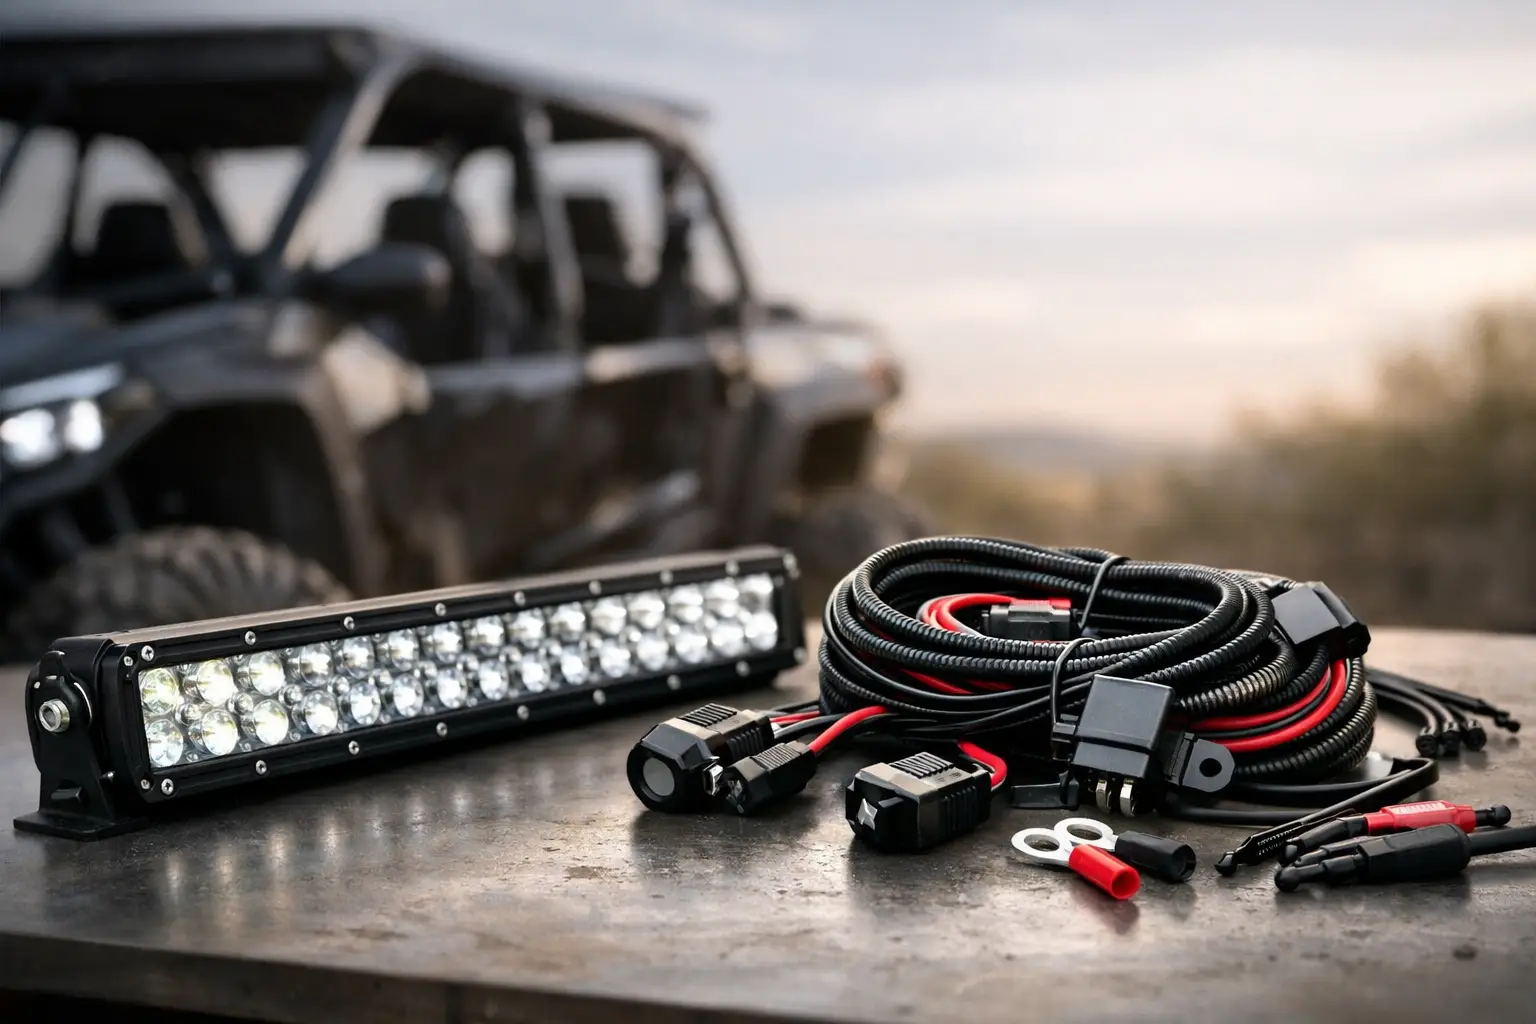
At minimum, a dependable kit needs a fused power lead, relay, switch, battery terminals, and enough wire to reach your mounting location without forcing awkward routing. That sounds basic, but the details separate a reliable setup from one that becomes a maintenance issue.
The fuse should be sized for the light bar's draw, with enough protection to prevent wiring damage if something shorts. The relay should be weather-resistant and rated above the expected load, not right at the limit. The switch should feel solid, mount cleanly, and ideally seal out dust and moisture. Good terminals and protective loom also matter more than most riders expect, especially on machines that see washdowns, creek crossings, or constant vibration.
Some kits also include inline connectors, ring terminals, heat shrink, and mounting hardware for the relay and switch. Those extras are not fluff when you are trying to avoid splicing together a half-finished install in the garage.
Why generic harnesses often fall short
A lot of universal wiring kits are built for broad compatibility, not UTV-specific conditions. They may have enough wire for a small automotive install, but not enough length for routing from the battery to a roof-mounted bar on a four-seat machine. They may also use lighter-gauge wire than you want for a higher-output light.
The other issue is environmental exposure. A side-by-side sees more dust, mud, rain, vibration, and impact than a typical street vehicle. Connectors that survive under a car hood do not always last when mounted near a cage, in an open cab, or around suspension movement and debris.
That does not mean every universal kit is bad. It means you need to evaluate it like an off-road component, not a generic electrical accessory.
Choosing the right UTV light bar wiring kit for your setup
The best utv light bar wiring kit depends on three things - the light bar's power draw, where you are mounting it, and how clean you want the install to be.
Match the harness to the light's amperage
Start with the light bar's actual current draw, not just the advertised wattage on a product listing. If the bar pulls more amperage than the harness, relay, or fuse can comfortably support, you are building in heat and failure points. A little overhead is smart. Oversized protection is not. If the fuse is too large for the wire, it stops protecting the system the way it should.
If you are wiring a larger bar or pairing multiple lights on one harness, pay close attention to wire gauge. Longer runs need more consideration because voltage drop becomes more of a factor, especially on roof-mounted setups.
Think about switch location early
A switch sounds simple until you realize your dash is already full, your cab enclosure limits access, or your preferred mounting spot interferes with other accessories. Before buying a kit, decide whether you want a dash-mounted rocker switch, a clamp-mounted switch, or something integrated into an existing switch panel.
For machines with multiple accessories, a standalone harness can be fine for one light bar, but a switch panel or accessory bus may make more sense if you plan to add pod lights, a whip light, or other powered upgrades later. It costs more up front, but it can reduce clutter and make future installs cleaner.
Consider your machine layout
A two-seat trail machine and a four-seat utility setup do not route the same way. Battery placement varies by model. Some machines give you a straightforward path to the dash and roof. Others require more planning around plastics, storage boxes, seats, or enclosed cabs.
That is where fitment-minded shopping helps. Riders often focus only on the bar mount, but harness length and routing are just as important if you want a clean result without stretching wire or adding unnecessary extensions.
Installation details that make a big difference
A wiring kit can be high quality and still perform poorly if it is installed carelessly. Most electrical issues come from routing, connection quality, and exposure points, not the light bar itself.
Keep wiring away from exhaust heat, steering components, sharp edges, and moving suspension parts. Use loom, grommets, and clamps where needed. If you pass through plastic or metal panels, protect the wire at the entry point so vibration does not wear through insulation over time.
Grounds deserve extra attention. A weak ground can create intermittent problems that look like a bad switch or failing light. Use a clean grounding point or go straight to the battery when possible. Loose crimp connections are another common source of failure, especially after repeated vibration on rough trails.
Weather sealing also matters. Even if a kit includes connectors, check whether they are truly suited for wet and dusty conditions. Heat shrink and dielectric protection can go a long way toward extending service life.
Single light bar vs. expanded lighting setup
If you are only running one moderate-output light bar, a dedicated harness is usually the cleanest and most cost-effective route. It is straightforward, easy to troubleshoot, and does exactly one job.
If you are building a more complete lighting system, things change. A front bar, rear work light, ditch lights, and chase lighting can quickly turn into a web of separate switches and relays. In that case, it may be smarter to step back and think in terms of a broader electrical plan instead of treating each light as a standalone install.
There is a trade-off here. A simple kit gets one accessory online quickly. A more centralized setup takes more planning but often pays off in easier control and cleaner wiring later.
Common mistakes buyers make
The biggest mistake is assuming every harness labeled for LED lights is automatically suitable for a UTV. Ratings, wire length, sealing, and switch quality vary a lot. Another common issue is buying for the current setup only, then replacing the harness later when a larger bar or additional lights are added.
Some riders also underestimate how much installation environment matters. An open-cab mud machine needs different durability than a mostly dry ranch unit. A hunting rig with a roof, windshield, and enclosed cab may need more thought around switch access and wire routing than a bare trail machine.
Then there is the fitment problem. Even with a universal electrical kit, the install still needs to work with your machine's battery location, dash layout, cage design, and accessory load. That is why model-specific support is worth paying attention to when shopping.
What to look for before you buy
A worthwhile kit should clearly state relay capacity, fuse protection, wire gauge, connector type, and intended light compatibility. If those details are vague, that is a red flag. You should also know whether the switch is illuminated, weather-resistant, and easy to mount in your machine.
Product support matters too. When you are outfitting a Polaris, Can-Am, Yamaha, Kawasaki, or Honda side-by-side, the best buying experience usually comes from retailers who understand UTV fitment and accessory integration instead of treating lighting like a generic add-on. Side By Side Sports is built around that kind of vehicle-specific shopping, which saves time when you are trying to match parts to real-world use.
A good wiring kit is not the flashy part of a lighting upgrade, but it is the part that decides whether your setup works reliably when the trail gets dark, the weather turns, or the job runs later than planned. Buy the harness with the same care you use when choosing the light bar, and the whole system will make a lot more sense the first time you flip the switch.